How to Remove a T-Bar Style Watch Band Link
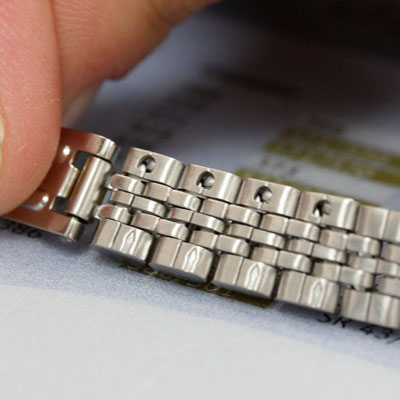
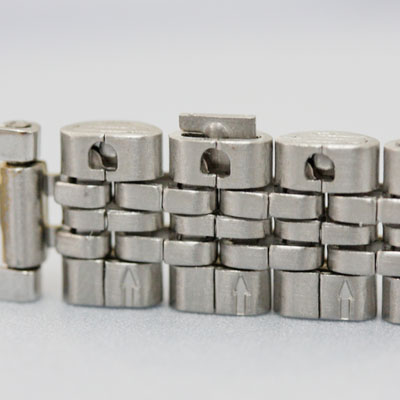
If your metal watch band is tool big, you can always make it smaller to ensure a perfect fit by removing links. You can use this guide to remove links that are held in place with T-bar style pins. How will you know if your watch band is held together with t-bar pins? Turn the band over and look at the back. If the links have oval shaped cutouts in the back with arrows pointing toward them, your watch most likely has t-bar pins holding it together.
|
- A bench mat or other protected surface
- A pair of band link removing pliers
- A small ball-peen hammer
- A spring bar tool
- A watch band holder
- And a parts tray
|
When you need to adjust the length of your metal watch band by removing links, it helps to know exactly how many links you need to remove.
Once you know how many links you need to remove, you need to decide how many links you are removing from each side of the band. Remember that anytime you are removing more than one link, you should split the total to be removed between both sides of the clasp so you can keep it centered on your wrist.
|
Next you will need to pick which side of the watch band you want to start removing links from. When you've decided, examine the back of the watch band. You should see several small arrows that show which way the pins need to be pushed out of the band. Position your watch band on its side on the bench mat so that the arrows on the links are pointing up toward the ceiling.
If you don¨t feel like you have enough room to access the links with your spring bar tool, you can open the watch band clasp to give you more room to work inside the band.
|
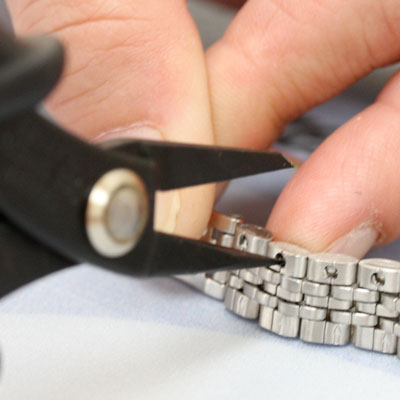
Take your band link removing pliers and insert the longer, pointed end into the oval cutout in the band. The point should rest in the deepest point of the cutout to be under the ^T ̄ of the link.
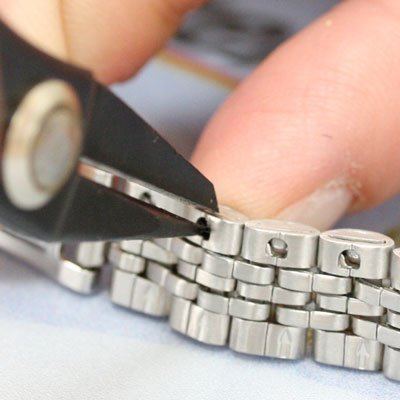
With the first jaw in place, close the pliers so that the flat top jaw rests on the solid part of the link. Then, when you are sure that the jaws are in the right place, squeeze the jaws together to push the link up and out of the band. You may have to do this several times to push the link out.
|
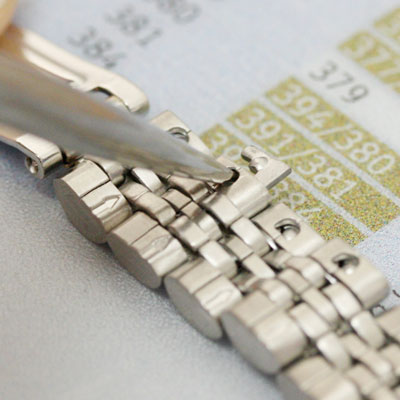
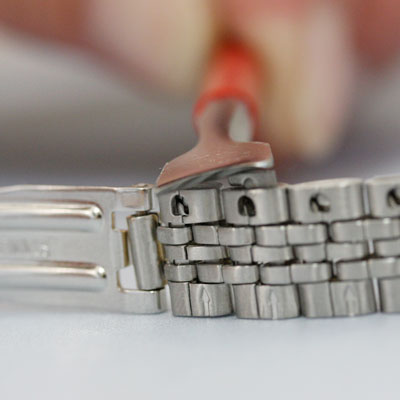
When the link is protruding from the band and you can't push it out any further with the band pliers, lay the watch band flat on the mat and use the pointed end of your spring bar tool to push the link pin the rest of the way out of the band. Once you can see the hook or "T" of the pin, you can pull it out with your fingers and place it in your parts tray. Let the band fall open where the t-bar has been removed.
|
Now you should count the number of links you need to remove from this side of the band and reposition the band on its side so you can remove the t-bar pin holding those links in the band.
|
Pick up your band link removing pliers again and insert the pointed end into the oval cutout in the band. Remember, the point should rest in the deepest point of the cutout to be under the ^T ̄ of the link. Close the pliers so that the flat top jaw rests on the solid part of the link. When you are sure that the jaws are in the right place, squeeze them together and push the link up and out of the band.
|
Once you cannot push the pin out any further with the pliers, rest the watch band flat on the bench mat and use the pointed end of your spring bar tool to push the link pin the rest of the way out of the band. When you can see the complete hook of the pin, you can pull it out with your fingers and place it in your parts tray. Set the loose links you have just removed in your parts tray as well to keep them safe.
|
Now that the first links have been removed, you are ready to put this first side of the watch band back together again. Put the two loose ends of the band together so they form a solid link and grab one of the t-bar links that you removed from the band. Slide the loose t-bar into the hole in the links so that the long straight part goes in first, and the T-section stops the link from sliding completely into place.
|
Insert the watch band into your band holder now, so that the raised end of the t-bar link is facing up. Take your spring bar tool, or other tool with a wide flat surface, and rest it across the top of the t-bar link. Then, using the flat-head of your ball-peen hammer, pound the link back into place - be sure to start gently and slowly increase the pressure you are using until the pin starts to move down into the links. Stop when the link is flush with the band.
|
With the band back together and before you remove any links on the other side of the band, put your watch back on and check to see how it fits. Feel free to do the link test again and see if you still need to remove the number of links you expected.
|
Once you have verified the number of links you need to remove, take the watch off again and turn it so you can remove the next links from the other side of the band. Repeat steps 3 through 9 to remove the remaining links and close the band again.
|
Now that your watch band fits just the way you want, you can wear it again. Be sure to keep the extra links and pins that you removed from the watch in case you need them again in the future.