|
Speidel bands contain no user serviceable parts and it is recommended that all adjustments be performed by a trained watch technician. Attempting to adjust the product by yourself may void the manufacturer's warranty.
If you are still intent on attempting to adjust your band yourself, you should use the sizing guide below to find a band similar to yours and then carefully follow the step by step instructions.
|
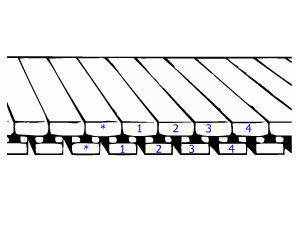 |
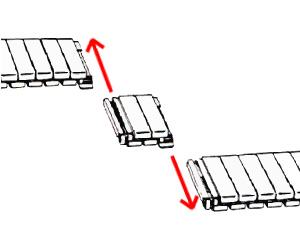
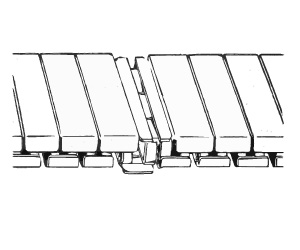
PLANNING THE ADJUSTMENT 每 You may start your adjustment anywhere near the center of the watchband. This Illustration shows the starting point as a star with adjacent topshells and bottom boxes numbered. Decide how many links you wish to remove.
If you want to remove three links, remove topshells labeled with a star and 3 and then work on bottom boxes labeled star and 3.
These illustrations show the removal of three links, so the topshells and bottom boxes labeled with a star and 3 will be worked on. |
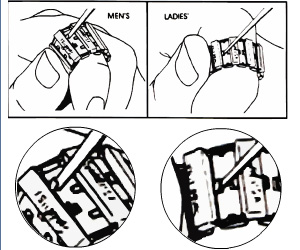 |
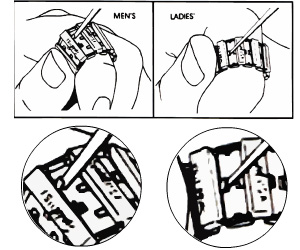
Step 1 每 Expand the bottom of the band to expose the topshell tabs. Use a thin blade to straighten up all four tabs on Men's Watchbands. NOTE: Ladies' Watchbands have only two tabs. |
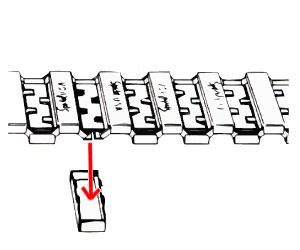 |
Step 2 每 When the tabs have been fully straightened, expand the band and the topshell will fall out. Save the topshell for step 11. |
 |
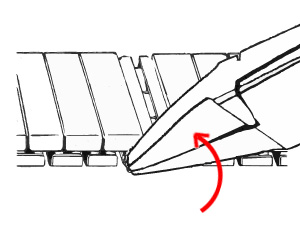
Step 3 每 To shorten the bracelet, remove an additional topshell according to your plan. Bend down the bottom box end flaps diagonally below the two exposed links as shown. |
 |
Step 4 每 When the end flaps have been bent fully flat, push in the direction of the arrows to separate the bracelet. |
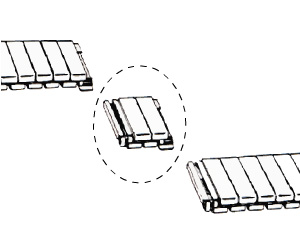 |
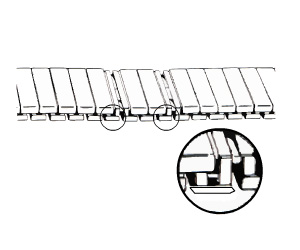
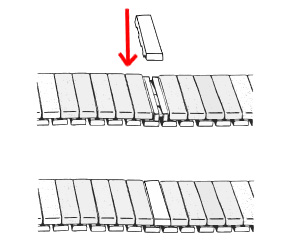
Step 5 每 The watchband is now in three separate sections. Save the circled extra links for future spare parts. The other sections are now ready for reassembly. |
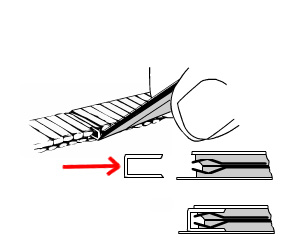 |
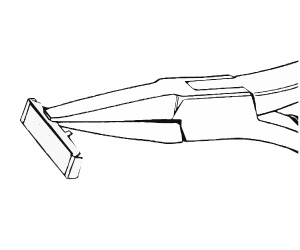
Step 6 每 The staple can be best held for insertion with small tweezers (or pliers) across the heel as shown.
The cutaway view shows correct position of the staple legs. The springs must be enclosed with the 'U' shape of the staple. |
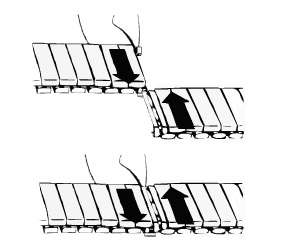 |
Step 7 每 Remove loose front staple shown by arrow. Slide the separated sections back together. The rear staple may interfere unless it is moved away from the adjacent link with your thumbnail. |
 |
Step 8 - Replace the staple removed in step 7. Note the correct insertion of the staple as illustrated. The upper leg of the staple must be inserted above the spring on the top box and the lower leg goes under the spring in the bottom box. |
 |
Step 9 每 Bend up the bottom box and flap. |
 |
Step 10 每 Topshell tabs and sidewalls may have been distorted during removal. This distortion can detract from the appearance of the band. Use smooth flat-jawed pliers to restore flatness. Topshell will assemble more easily and look better. |
 |
Step 11 每 Re-straighten tabs on loose topshell that you have saved from step 2. Position topshell lightly on exposed top box. |
 |
Step 12 每 Expand the band as illustrated. Topshell will then seat completely on top box. Bend down tabs with thin blade to lock topshell in position. |